> ## Documentation Index
> Fetch the complete documentation index at: https://developer.novacpayment.com/llms.txt
> Use this file to discover all available pages before exploring further.
# Setup Primary Settlement Account
> Learn how to setup your settlement account.
## Overview
In Novac, every split payment setup starts with configuring a Primary Settlement Account.
This account serves as:
* The default destination for all incoming payments
* The fallback account for any remaining balance after split distribution
* The parent account to which all sub-settlement (split) accounts are linked
Before you can create and manage split payments via API, your primary settlement account must be configured on the dashboard.
## Prerequisite
Before you begin, ensure that you’ve completed the following steps:
* [Create a merchant account](/docs/getting-started/create-merchant-account): make sure your account is created and KYC is completed.
* [Set up a settlement account](https://www.app.novacpayment.com/login)
It's important to add bank details during the KYC process. This can be used as your default settlement bank when configuring split payment.
***
## Understanding Settlement Options
Split payment in Novac is built on a parent–child structure that ensures funds are distributed reliably and automatically. At the core is the Primary Settlement Account, which is configured via the dashboard and acts as the main destination for all payments. This account receives the full payment when no split is applied, and also collects any remaining balance after split distribution.
Attached to this are Sub-Settlement Accounts, which are created via API and are assigned specific portions of each transaction based on your split configuration (either flat or percentage).
These sub-accounts cannot exist independently, they are always tied to a primary account.
## Transaction Flow
When a transaction occurs, the customer completes payment as usual. Once the payment is successful, Novac automatically applies the defined split rules: each sub-settlement account receives its allocated share, while the remaining balance is routed to the primary settlement account. Finally, funds are settled according to your configured settlement destination (bank account or wallet), following the applicable settlement cycle.
```mermaid theme={null}
flowchart TD
A[Customer Initiates Payment] --> B[Payment Completed]
B --> C[Novac Processing Engine]
C --> D[Apply Split Configuration]
D --> E1[Sub-Settlement Account 1]
D --> E2[Sub-Settlement Account 2]
D --> E3[Sub-Settlement Account N]
D --> F[Primary Settlement Account]
E1 --> G["Settlement (T+1 or applicable)"]
E2 --> G
E3 --> G
F --> G
G --> H[Bank Account or Novac Wallet]
```
This diagram illustrate how Novac handle split payment from the point of creating a transaction to fund settlement.
## Settlement Cycle
Settlement timing determines when funds become available
Local Transactions: T+1 (settled the next business day)
International transaction: T+7
T+1 means the transaction is settled one business day after it is completed.
## Manage a Primary Settlement Account
* When you have logged into your dashboard, click on settings on the right pane and select transaction settings.
* Click on **Collection Settlement Destination**
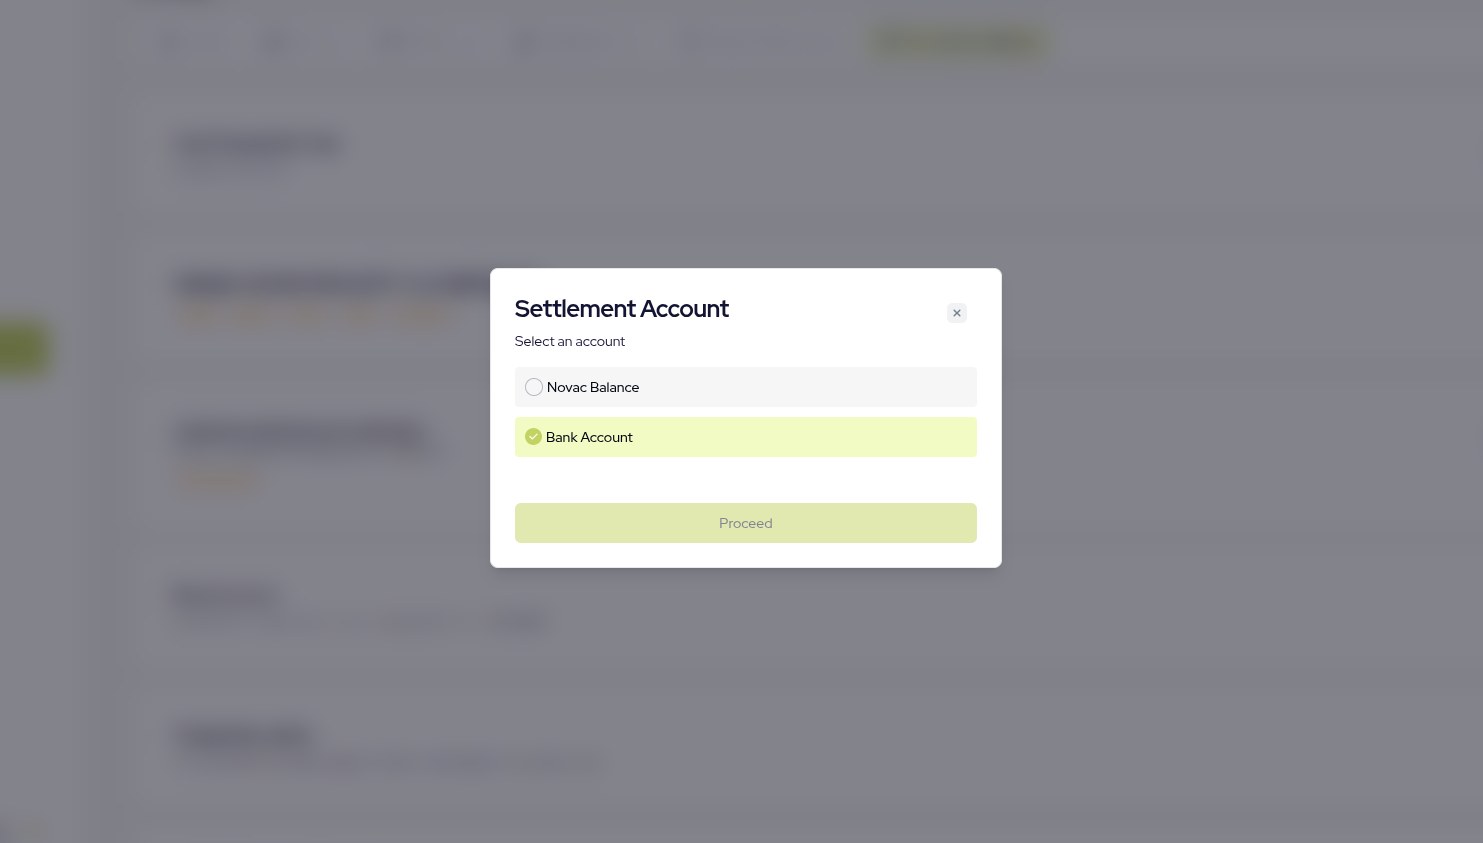
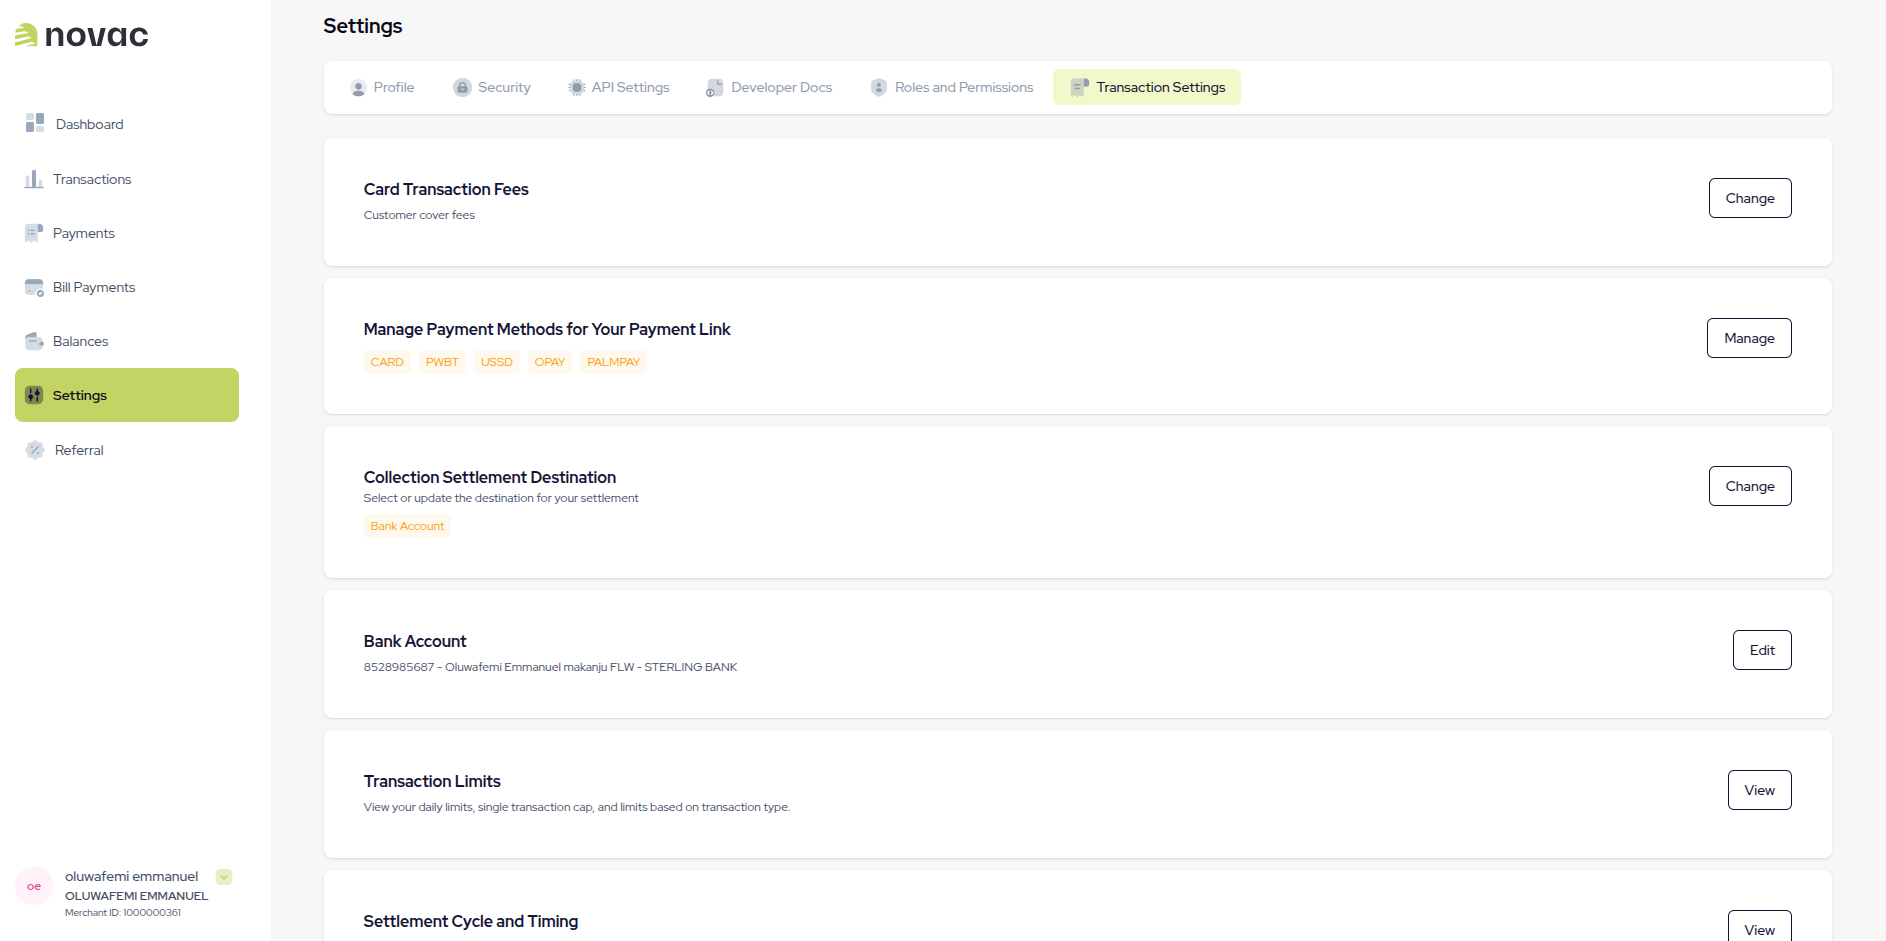 When you Click on **Collection Settlement Destination** you may select:
* Novac Balance: This is your default Novac wallet used as your primary settlement destination.
* Bank Account: When you select bank details, we automatically use your default bank your submitted during KYC.
Your bank account can be changed if you intend to use another settlement bank details.
When you Click on **Collection Settlement Destination** you may select:
* Novac Balance: This is your default Novac wallet used as your primary settlement destination.
* Bank Account: When you select bank details, we automatically use your default bank your submitted during KYC.
Your bank account can be changed if you intend to use another settlement bank details.
 ***
## What Happens Next?
Once your primary settlement account is configured:
* You can [create sub-settlement](/docs/accept-payment/split-payment/manage-sub-settlement-accounts) accounts via API.
* Define flat or percentage split rules.
* Initiate transactions using split configuration via [create checkout payment](/docs/accept-payment/checkout/create-checkout-with-transaction-reference#create-checkout-payment-with-split-payment).
* Automatically distribute funds upon successful payment.
***
## What Happens Next?
Once your primary settlement account is configured:
* You can [create sub-settlement](/docs/accept-payment/split-payment/manage-sub-settlement-accounts) accounts via API.
* Define flat or percentage split rules.
* Initiate transactions using split configuration via [create checkout payment](/docs/accept-payment/checkout/create-checkout-with-transaction-reference#create-checkout-payment-with-split-payment).
* Automatically distribute funds upon successful payment.